If you've landed on this blog by mistake, please follow this link:


www.NorthCarolina.PreppersNetwork.com

Please update your bookmarks and the links on your sites.


Join our forum at:


Tuesday, June 29, 2010

Protect Your Rights When Confronted By Police

Adapted from a post on Survival.blog.com

Police Comments and Graphics for MySpace, Tagged, Facebook
Comments and Graphics - Layouts - Photobucket


As Preppers, we may be aware of our rights against search and seizure without just cause and/or warrants, right to an attorney, etc. Shoot, we have spent years watching Law and Order and CSI!

Today I read a post on another website about a homeowner who maced two young men (fraternity brothers) who were trespassing on his property. Apparently, this trespassing had happened before since a fraternity house was next door and the students would use his unfenced property as a shortcut. Calls to the police were not successful. This time he went into his dark yard and maced the two men. They brought charges against him, and he is being prosecuted by a zealous D.A. http://www.survivalblog.com/2010/06/you_versus_the_perps_their_law.html

I have no interest in discussing whether he had the right to do what he did, or the wisdom of his actions. What was interesting were the posts in reply to his story, particularly how he dealt with the police after the event.

He did what I suspect many of us would do--try to be cooperative and reasonable since you obviously did nothing wrong and have nothing to hide.
The cop was bright eyed but young. I was friendly, let him in. Explained it like I am now, minus the edge. My demeanor probably kept me from jail....In the meantime off to court I go.

I'm trying to stay okay with cops. The D.A. will be harder not to hate. The officer asked for a voluntary statement which I gave the next day, said pretty much the same as I had during the initial interview. No lies or distortions; Joe Friday's "just the facts." The Assistant D.A. used it against me! Later, my attorney said that giving the statement showed I "had no understanding whatsoever about how the criminal justice system works."

Many Preppers have concealed carry permits and weapons, and the liability that goes along with that. Some of us have guns and ammunition for hunting as well as protection, knives, pepper spray, training in hand-to-hand combat, etc. But what happens if you actually find yourself in a situation where you have to defend yourself. I will assume you are NOT the aggressor or law breaker who deserves to be arrested and convicted.

Imagine that you have finally had to take a violent action to protect yourself, family, or property. The adrenaline will be flowing, you will feel like the other party deserved what they got, and any reasonable person would agree that you were justified in taking the action you did. Why would you not want to talk to the police to give them your side. You really want them to understand. And besides, only guilty people ask for an attorney, right? Once they know what really happened, you won't have to get an attorney and can save all that money, right? Wrong.

Some of the responses to the above post are from an 18 year police veteran and a 20 year firearms instructor who gave some wise advice. The Police Officer acknowledged that police officers will say whatever it takes to get information from you, get access to your property with your approval (no warrant), and may talk like they are your best friend and agree that you were in a tough situation, had no choice, etc. He also emphasized that they do not care about your best interests--only their own. http://www.survivalblog.com/2010/06/seven_letters_re_you_versus_th.html

Here's what the firearms instructor advises you to do and say:

"I think I'm in shock and need to go to the hospital." Often more true than you might think.

"I want to talk to my attorney."

He who calls 911 first is the "victim". Prior to the point where you will be using force against one or more opponents, you should call 911 and keep the line open. The call is recorded and can be used in your defense. If things happen too quickly to call first, call immediately after the incident and ask for help. This way you get to tell the story first.

Be absolutely sure of the laws involving force (lethal or non-lethal) in your state. For instance, here in Ohio lethal force may not be used to protect property, but in Texas things are much different. Know your laws.


The Police veteran wrote the following:

As a police officer I can give you the following advice:

1) Don't let me in your house unless I have a warrant. If I have a warrant, don't resist my entry.

2) Do not consent, in writing or verbally, to a search of your person, vehicle or residence. No matter what I promise, no matter what I threaten. If I had probable cause for a search, I'd be doing it. If I am asking for your consent, it's because I am on a fishing expedition or because I don't have probable cause yet.

3) Don't try to explain. If the police are there, something has gone wrong or something bad has happened. If something has gone wrong or something bad has happened, then you probably need a lawyer.

4) There are hundreds of petty laws I can arrest you for, If you aren't in handcuffs, don't give me a reason to put them on you. Once I arrest you, my ability to search you and your property generally increases.

5) If you are having problems with trespassers or something similar, document it. Call the police and record the time and result. Keep calling. The squeaky wheel gets the grease. Contact your elected representatives (local/municipal/county etc). Find others who are having the same problem and attend community meetings. Request an appointment with the police commander or tour chief responsible for your area. Address your concerns in a professional, calm manner.

6) Even if the police are wrong and you are being victimized by them, do not make matters worse by resisting/fighting etc etc.

7) Video and audio recording devices are cheap, small and getting cheaper and smaller all the time. They come in handy.

8) The police are not your friend. The police are doing a job. The police want to go home at night. The police will do what benefits the police, not what benefits you.

9) Know the law. Know your rights. Know your lawyer's phone number. Just remember, one thing police really, really dislike is being lectured by someone claiming to know their rights, claiming to know the law. More often than not, someone who is screaming "I know my rights!" is wrong. - Tom M.

How can you prep for this? Take Tom's advice and have a lawyer's name and number available, and learn your state laws right now. I would add, make sure you are well-trained in the use of any weapons or self-defense tools you have in your possession.
------------------------------------------
Join the APN Forum at www.AmericanPreppersNetwork.net
Visit the North Carolina Forum at www.NorthCarolinaPreppersNetwork.net

Thursday, June 24, 2010

THE BEST OF ALASKA ROSE: Canning Meat


I am 67 years old and have been canning most of my life. I grew up out in the hills with no electricity and still live that way. I can a variety of meats prepared in any way that strikes my fancy at the time.

There is a difference in the safety of pressure canned over water bath canning on meat and vegetables. For fruit, sauerkraut, pickles and jam, water bath is the best way to go. I don't recommend that you take the chance of water bath canning meat or vegetables because of the high incidence of botulism poisoning and assorted other health issues. The internal temperature of the food in the can or jar must reach a certain temperature for a set amount of time to kill these organisms in the food which isn't easy to do using the water bath method.

I grew up only using water bath method, and we even canned meat and fish, but now I hesitate to even mention times and methods of doing so. It can be deadly. Every year here in Alaska, there are deaths attributed to improper canning or food storage.

For myself, I prefer a pressure canner using no rubber gaskets at all, only metal to metal seal, with screw down toggles. To me it is the safest canner made. I personally love the All-American pressure canner. No rubber gaskets to worry about and with the screw down toggle closure, it is the safest canner on the market, as far as I know. There may be other canners made in the same style, but I have 3 different sizes of the All-American, all various ages, all still work very well. It is an All-American Pressure Cooker, made by Wisconsin Aluminum Foundry, Inc. in Manitowoc, Wisconsin 54220. At least that is where they were located waaaay back when I got mine.

I make mini meatloaves and can in brown gravy, or fix the meat in any manner you want the finished product to taste like, only go lightly on the spices as some do not handle the extreme heat and pressure without changing, and some become bitter. If canning anything that is extremely solid pack or has added starch of any type, it is best to hot pack the jars, and then continue with canning never letting them cool before processing. You really want the center of the pack to reach the appropriate temperature during processing.

BARE BONES BASIC MEAT CANNING: You can just raw pack the meat, trimmed and cut into cubes, with a smidgeon of salt per jar (scant half teaspoon per pint jar), no water added. Cut meat into small chunks or cubes, trimming off anything you would not eat if fixing any other way. If you don't like fat on your meat, trim it off. Leave about an inch of empty space at the top of the jar, wipe the rim of the jar well, and make sure no nicks or cracks, put the lid on firmly but not tightly. The single most important thing in any type of canning is to keep everything extremely clean.

Pack the cut meat chunks into the jars not extremely tight, but not really loose, either. Do not add other liquids if doing a raw pack of meat, it will form juices as it cooks. If you want a firmer gelatin in the cooled jar, add a teaspoon of plain gelatin in the bottom of each jar before adding the meat. Wipe the rims clean and place clean sterile lids and rings on the jar, closing firmly. Think average woman firmly, not he-man firmly.

Have your pressure canner on the stove, but not heating up yet with raw pack. Make sure the trivet is in the bottom of the canner and enough water to not boil dry while venting steam, usually at least 2 inches of water. Fill the canner with the filled closed jars of meat. If you have the room in the canner to place another layer of the jars in an upright position without touching the lid of the canner, place another trivet evenly on top the first layer of jars, and add a second layer of filled jars with lids. If you don't have enough jars to fill a layer, add empty jars with just water in them, no lids on them, to help keep jars from possible tipping over during processing.

Place the lid on the canner, and gently tighten all the toggles around the lid, doing the 2 opposing ones only to touching, all the way around the lid, then gently tighten 2 at a time, opposite each other, so you are applying even pressure on the lid all the way around. These canners are made of aluminum, and it is soft. The lid has an arrow on it that needs to be pointed at a mark on the side, every time, as the lid will seat correctly doing this.

Remember to exhaust the steam from the canner first, before starting to build pressure, so you have a more accurate pressure reading. County Extension Service usually has temperature/pressure charts available if you have one in your area.

Bring the canner to a boil, letting the steam exhaust for about 10 minutes through the open petcock valve. Then flip it down, so pressure will start to build in the canner, watch the gauge. When it reaches 10 pounds pressure at sea level, you will have to adjust for higher elevations, then you turn the heat down to maintain that pressure, neither rising nor falling, for 1 hour, 30 minutes for pint jars. When the time is up, turn off the heat and let the pressure drop by itself, do not open or raise the petcock until the gauge is at zero. If the pressure falls below 10 pounds of pressure during the cooking interval, restart your timing after you get back to 10 pounds pressure. Turn off the canner after the time is up and allow it to lose pressure on its own. Do nothing to speed the drop in pressure.

Once it is back to zero, open the petcock, and then unscrew the toggles and remove the lid slowly, away from you so you don't manage to scald yourself a bit with the steam. Remove the jars carefully from the canner, placing on a heatproof surface and out of any drafts, lightly cover if you worry about drafts hitting and breaking the jars. I cover mine with a large towel. Empty and clean the canner.

The jars should all seal within a short time. Do not remove rings until you make sure the jars are cold. I usually wait a couple of days, and recheck the seals before putting the jars away in a cool, dry storage area. It is also helpful to label the jars when they are cool, as no matter how good your memory is, a year or two down the road, you might not remember exactly what it is, in that jar.

Canned meat can be used as any cooked meat. HOWEVER, there are so many other ways to can meat, you will seldom do this after you get going on it.

I can meat patties made from hamburger or sausage, and browned burger, canned dry pack to use as any browned burger in any recipe. A pint is about a pound of browned burger. Meatballs can be cooked and either dry packed hot or canned in any sauce you choose. Try not to use too heavy a gravy in home canned meats; the starch can slow the amount of heat reaching the center of the jar for the required amount of time needed. Mini meatloaves in light brown gravy are delicious. Sliced roasted turkey or any roasted meat in light gravy or au jjus is very nice. Want a tender French Dip sandwich? Open a jar of sliced roast beef or venison in au jus, heat place on a roll and dip.

If you want to experiment a bit, add a few drops of liquid smoke in the bottom of the jar, before adding meat. It gives it a nice smoky flavor for making sandwiches later.

Canned meat is really good to grind after opening. Mix with chopped onion, pickle, what have you, and add mayonnaise or sour cream and mustard as a sandwich spread or dip.

I use a small single burner camp propane burner that is really cheap to do outdoor cooking and canning in the summer. I also have a huge All-American canner too big to lift easily on a stove that has been fitted into the upside down metal trash can with the bottom cut out, and vent holes for air cut around the bottom. Then a weedburner unit was cut and angled so it faces up onto the bottom of the huge pressure canner, so it can be hauled to the river or ocean to can super fresh fish on site.

(Editor's Note: Please check with your local Cooperative Extension Service for safe canning techniques and recommendations for your area and elevation. The "Ball Blue Book of Preserving" includes instructions for canning a variety of meat which is consistent with Alaska Rose's advice.)

Recipes for home-canned meat, chicken, and seafood: http://www.uga.edu/nchfp/how/can5_meat.html
http://creativecanning.blogspot.com/

Videos of the canning process and using a pressure cooker: http://www.uga.edu/nchfp/multimedia.html#video
------------------------------------------
Join the APN Forum at www.AmericanPreppersNetwork.net
Visit the North Carolina Forum at www.NorthCarolinaPreppersNetwork.net

Monday, June 21, 2010

Prepper Friends versus Security

Last weekend my husband and I participated in the first NC Forum meet-up. Pictures and comments are posted on the forum: http://www.americanpreppersnetwork.net/viewtopic.php?f=157&t=3222

Planning the camp-out and attending such an event required that I examine my feelings about remaining anonymous as a prepper which conflicts with my desire to share, learn, and even socialize with like-minded people. I also support the premise that in a serious situation it is better to be part of a group of reliable people than try to survive alone. But how do you do that without putting yourself and your family at risk?

My husband and I have not been in North Carolina very long and do not have any family close. Our home is fairly isolated, and we rarely see our neighbors. So where do I find this support group of preppers who I may be trusting with my life?

First, we do not casually share our prepping. My daughter and son-in-law know, and that is about it. Some others know we have a garden and have gotten into making soap. There are friends and family I have tried to help become "aware" who believe we are at the best weird, and at the worst nuts. One old friend that I discussed this with by email only on the most superficial terms, kind of gave me an electronic pat on the head, and said something like, "That's nice, but just don't get all twitchy on me." Too late. She doesn't have a clue about my real preps. So where are these people who I should count on to help defend against the Zombies?

I have learned that you need to be very careful about information you share online. In public forums, people are not always what they seem, and anyone can read information you put in your profile or write in your posts. Put it together and your anonymity can be at risk. I wonder, who might find out who I am and stake us out for what they may perceive I have of value? Could someone in the government use the information if they decide to confiscate weapons or stockpiles of food to redistribute? Paranoia? Maybe, but I also believe in caution.

The first time I talked about my prepping to people I didn't know well was at a Whole Grain Baking Retreat sponsored by the Millers Grain House. My intent in going was to meet some other women with whom I might become friends and who share some of my beliefs. It worked! Donna and Lynnette are now on this forum and another friend's husband, pnutcrushr, joined. I have to tell you, it was a great feeling to find friends like them who I can talk to openly. It is also unifying to have something so important in common. We never run out of stuff to talk about! Unfortunately, they do not live in my neighborhood.

Before this weekend, we pondered about the wisdom of putting ourselves out there and exposing ourselves to people we didn't know except online. We talked about it in camp, and everyone else had similar thoughts. It seemed like a reasonable risk, especially since I already knew Pnutcrushr's wife, and Whisper and Maustypsu have been active, supportive forum members for quite awhile. We don't regret it for a moment. These preppers are fun, smart, interesting people! There were no hidden agendas or manipulative behavior. I am happy to call them friends and look forward to enlarging our circle.

But, alas, they do not live in my neighborhood, either. But I feel that I could count on any of these folks, and that we will have each others' back. We are already starting to plan our next get together. Trust takes time. I am willing to invest that time.

A month ago I only had cyber friends who are preppers. Right now I have six real people prepper friends and feel pretty darned lucky. Now I have to start working on my neighbors.


------------------------------------------
Join the APN Forum at www.AmericanPreppersNetwork.net
Visit the North Carolina Forum at www.NorthCarolinaPreppersNetwork.net

Tuesday, June 15, 2010

THE BEST OF ALASKA ROSE: Butchering Large Game

Alaska Rose (right) and her mother with a moose.

I have made some sketches of how to skin and gut and clean any large game animal without getting up to your shoulders in the body cavity. I can butcher out a moose, skinned and quartered without having anything more than the wrist of my plastic gloves smudged with blood. I just dropped my Registered Hunting Guide license after several years of enjoying getting paid for what I love to do, so I do know about butchering large game. Those (latex) gloves are worth it, to pack in, no matter how light you want your pack to be.


I don't have running water, so I like to stay as neat as possible. If you skin out the critter, and leave it on the hide, remove the top legs before attempting to gut it. Here (in Alaska), as soon as the gut cavity is opened, we have bears, and they are not interested in who got there first. So since I am usually doing a moose by myself and cannot turn one by myself, I remove all 4 legs and the back-straps, cut the head off, and THEN cut along the edge of the ribs to open the entire gut cavity, keeping the flesh over the gut as one large piece.


In the 2 sketches, the first shows an alternate way to gut an animal without getting in up to your shoulders and working blind with a sharp knife. That has never been high on my list of things I really want to do, LOL. Cut back along the ribs to the back, down to the pelvic bone and across. The gut will roll out fairly easily. If you are working on an elk, this is almost a necessity for gutting, as they have sheets of muscle hanging down inside, to hold the intestines in place, since they are jumpers. This large flap of flesh should be used for burger or make rolled stuffed roasts out of it, cook long and slow to tenderize and you will have a nice meal that is usually wasted meat. You can cut any connective tissue, as elk have hanging to hold the loops of gut in place, without reaching up to your armpits and having your head halfway in when the bear shows up. Cut the ribs loose from the backbone and section the backbone and pelvic bone into chunks you can carry and leave the gut pile in short order.


The second sketch is a standard skinning, gutting diagram, showing where most folks cut, skinning and gutting and removing the lower leg sections.


One other small tip, use a utility knife with quick change blade, to skin and section out your large critter. No stopping to sharpen a dull blade, the blade is sharp enough to skin a tough hided moose in short order, and you can get back to camp as soon as possible for another cappuccino. Oh yeah, we eat really well in any camp I am in.


------------------------------------------
Join the APN Forum at www.AmericanPreppersNetwork.net
Visit the North Carolina Forum at www.NorthCarolinaPreppersNetwork.net

Sunday, June 13, 2010

THE BEST OF ALASKA ROSE--Introduction

I am starting a feature,"The Best of Alaska Rose", that are posts I have compiled and done some light editing on that my hero, Alaska Rose, has written on the APN Forum over the past several months. Why the NC Forum? Alaska Rose has been active on our NC Forum and is an official NC forum member. She also exemplifies the qualities and has the skills that my NC ancestors undoubtedly would have felt at home with.


First, here is an introduction to Alaska Rose in her words. Watch for her advice in future posts about canning, cleaning game, building a cabin, getting rid of a lazy man, building your own solar system, etc.


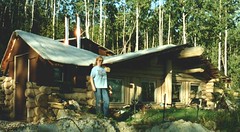
First place I ever built. It is 14 feet into bedrock at the back. Easy to heat in Winter and cool all Summer.


Hi, I moved up here from Oregon, in 1969. I'm 67, my Mom, living here also, is 89. I live north of Fairbanks, towards the Yukon river. I have worked as a gold miner, a Registered Hunting Guide, and a Fishing Guide. I moved out here a few years ago, lived in a tent the first summer while building my roads and building pads, then started constructing a home. Since then, have built a home for my Mom. My daughter and 2 of her kids and I built her a nice home here, also. I'm really glad we don't have to mess with permits and building inspectors. We are working toward being more self sufficient as we go. I have been a widow since 1988. There are no power lines here, no phone service either. However, I do have intermittent internet service through satellite.


I have 11 grandkids including the stepkids' kids, and one greatgrandkid. Eight of the grandkids live within 70 miles of here. So does the greatgrandkid.
I operate heavy equipment, do goldsmithing, registered hunting Guide and fishing guide, although I have let those licenses lapse. Also let my boiler operator license lapse and sawmill operator license. I do taxidermy work, build our homes and shop, and yes, I would enjoy male companionship. I do not HAVE to have a man around, but like men very much. Some men might be intimidated, but a true friend and companion would not be.


------------------------------------------
Join the APN Forum at www.AmericanPreppersNetwork.net
Visit the North Carolina Forum at www.NorthCarolinaPreppersNetwork.net

Wednesday, June 9, 2010

Coming Full Circle Back to Self-Sufficiency

Me (in the middle) with cousins on grandparent's farm
My family has always been proud that each generation has risen above our parents in terms of education, income, and standard of living. My grandparents, although very intelligent, were barely literate. Both of my grandfathers had been coalminers and subsistence farmers in Appalachia. My parents did not graduate from high school. They have always told stories about living without electricity, plumbing, taking care of the chickens, hogs, milk cow, big garden, preserving food, and sometimes going hungry.

They were proud that their children were not raised that way. My parents moved us to a northern industrial city where they worked in factories. We usually had a garden, but no chickens, hogs, or milk cow. My husband's background is similar. I went to college, eventually got an advanced degree and until recently lived in urban areas. Our daughter has her advanced degree and is a manager in NYC. She has gone to school and traveled in Europe--we haven't! She and her husband live in an apartment without even a window box. Each generation has become farther removed from self-sufficiency.

My husband and I retired and moved to NC in a mountainous, isolated, rural area with many acres. It reminds me of where I was born. We have become very serious about preparing for hard times, both short term and long term. You already know what I am going to say for you are probably experiencing the same thing. Now we are spending a great deal of time and energy trying to learn what my grandparents and parents always knew--how to survive on what you can grow, kill, preserve, and make yourself.

We initially focused on preparing our emergency kits, food storage, medical supplies, and water storage and treatment. We found that was actually the easy part. We knew from our efforts 30 years ago that to put away a year's worth of food and supplies is not enough. It was certainly more than most people did, but we could have been in a world of hurt if TEOTWAWKI happened. We found that our storage food was not easy to rotate. Everything was freeze-dried meals in #10 cans (not very tasty) or grain in large buckets packed in nitrogen that we weren't real sure what to do with. We made a few loaves of bread, but that was about it. We still have the #10 cans of freeze-dried food, but gave away the buckets of beans and grain to some LDS families when we were making one of our cross-country moves.

What are we doing different now? We are changing our lifestyle to become more self-sufficient. I have no doubt that our grandparents are in heaven laughing at our sometimes pitiful attempts, but would appreciate that we are trying. It breaks my heart that we lost the opportunity to learn all we could from them. Thank goodness for the APN preppers, and homesteaders who are willing to teach me.

Specifically, here are a few of the things we are doing to make ourselves more self-sufficient.
  1. We have no debt--no car payments, no mortgage, no credit card balance. In playing a "what if" scenerio, we thought what if my retirement check stops or is significantly reduced? What if our 401K savings become worthless? What if Social Security is unavailable to us? We don't want to be in a situation where a bank or the government can take away our property and home.
  2. We store what we eat, and eat what we store eating more unprocessed food. We grind our own wheat and other grains for bread, granola, oats, etc. We make our own hominy and corn meal from dry corn. We make soy milk, tofu, and tempeh from soy beans. We cook dry beans instead of from a can. We grow and eat sprouts. Unprocessed food bought in bulk costs much less than convenience food from the grocery store so we save a lot of money and can rotate our storage food. To become even more self-sufficient, we need to grow these items ourselves as some of our friends on the APN Forum do.
  3. We are growing much of our food in a garden that is getting bigger each year. This includes freezing, drying, and canning what we grow.
  4. One of our next big projects is to install an external, wood-burning furnace/hot water heater. We have an unlimited supply of wood for fuel. Our home is currently heated with electricity.
  5. We also plan to install a solar system this year so that we can be independent from the electric company and electric bills. We consider this to be a good investment while our dollars still have some value. We would also like to be able to generate our own electric power in the event it becomes unavailable.
  6. We are learning how to hunt and protect ourselves.
  7. We plan on raising some animals such as rabbits, chickens, and/or goats for meat, eggs, milk and fiber.
8. We store over 200 gallons of rain water and are adding to that system. Our water source is well water, and we have a septic tank.


9. We are making and using our own laundry detergent, bar soap, soft soap, and shampoo.

10. I installed clothesline poles and hang my clothes outside rather than use my clothes dryer. I think this must have been the first solar-powered appliance!

My grandparents didn't have solar for electricity--they used oil lamps for much of their lives and a wood-burning kitchen stove. Water came from a bucket dipped into the well. An outhouse and slop jars were the substitute for plumbing. A washtub set up in the kitchen was used for a bathtub. I really don't want to have to go back to those times--but know I can if I have to.
------------------------------------------
Join the APN Forum at www.AmericanPreppersNetwork.net
Visit the North Carolina Forum at www.NorthCarolinaPreppersNetwork.net

Saturday, June 5, 2010

10 Ways to Afford Prepping

If you are considering prepping for the first time or have just started, the thought of trying to store one or two years’ worth of food can be daunting. Then you read you are also supposed to have a medical kit, water, emergency go bags, and on and on and on.


If you are like most of us, you feel that you can barely pay for what you are going to eat this week AND pay the electric bill. You somehow know that now is the time to start putting some emergency supplies away, but how can you afford it? Here are some suggestions that have worked for us. Pick and choose those that apply to your situation, and keep your eyes open for opportunities that I haven’t thought of!


1. Use one, buy two.

This is one of the easiest ways to ensure you are storing what your family will eat. For any non-perishable foods on your list that you need for your kitchen pantry, buy an extra to put into storage. Canned tuna, soup, pasta, and beans are all good candidates. It may seem piddly at first, but you will be surprised how quickly it will add up, and you may not even notice the extra expenditures.


2. Buy extra when things are on sale or you have coupons.

Start paying attention to what things cost. When you see that a store has a significant discount on something you use, buy extra. There are times when it may even pay to buy one or two cases of an item.


3. Try shopping at alternative stores and/or buy in bulk.

Check out discount stores in your area such as Aldi, Save-a-Lot, dollar stores, Costco, and Sam’s Club. In many communities you can find a co-op or other source for bulk items such as wheat and other grains, beans, rice, and corn. The LDS church has warehouses around the country that may be used by non-church members if you volunteer some time.

But here’s some advice—don’t buy bulk whole grains, dried beans, corn, etc. unless you use it regularly. For example, learn and practice how to grind grains and bake your own bread. Use dried beans with rice or corn as a meat substitute. You will save a lot of money by using unprocessed food you have bought in bulk; your storage items will be rotated; and you will be eating delicious, healthy food. Use what you buy, and buy what you use!


For prepping equipment and tools on your list, try Craig’s List, garage sales, and Goodwill. If you pay attention, you can get some great deals on dehydrators, canning supplies, gardening tools, clothes, etc.


4. Buy fresh food in season in bulk and dehydrate or can it.

You will love serving your family strawberries, apples, vegetables, and even meat that you have preserved. By buying it in season, it is cheaper and better quality. By preserving it yourself, you have more control over what additives, salt, sugar, etc. that your family is getting.


5. Stop eating out so much—pack a lunch!

Eat at home more often and enjoy your healthier, home-cooked meals. Make an extra piece of chicken or save some of the salad and pasta in plastic containers for your lunch. You will save enough from one meal out to pay for your weekly food storage items.


6. As a family, create a budget and live by it.

Use a computer program or a yellow tablet, but keep track of what you spend and write it down in categories. You will be surprised by what you find out about where your money is REALLY going!


7. Evaluate the REAL value of potential new purchases against what is on your list of prep supplies and equipment.

Do you really need another Blackberry or computer game? You could buy a good dehydrator for what a lot of shoes cost.


8. Start practicing a more self-sufficient lifestyle now.

Look for ways to start reducing your use of disposables and energy. For example, I put up clothesline poles and now hang all my laundry outside. I have reduced my electric bill, have a way to dry my clothes in the event I lose power (prepping), and my clothes smell wonderful! Use cloth instead of paper napkins or paper towels. You will save money now as well as not have to buy and store replacements for your preps.


Start cooking with whole grains and other unprocessed food. Your food costs will be lower now; you will learn how to prepare your storage food, and your family will be used to it in case of a crisis; and you will be eating healthier food.


9. Grow a garden.

Even if you have a small yard or just a patio, you can grow enough food to put a dent in your food budget. You can use raised beds or even containers for many vegetables and herbs. Use edible plants in your flower beds.


10. Put aside all or part of any “extra” money for use to buy high-priority prep items.

My husband and I used his annual bonus to buy many of the prepping supplies that we could not have afforded otherwise. Other sources of money may be tax refunds, Christmas or birthday gifts, and salary increases.


Start looking at ways you are spending money and not benefiting from it or could sacrifice a bit. Are you paying for a premium cable package for channels you never watch? Stay home and play a board game with friends and family instead of going to a movie and having to pay for a babysitter.


How many other money-saving, prep-building strategies can you think of?


------------------------------------------
Join the APN Forum at www.AmericanPreppersNetwork.net
Visit the North Carolina Forum at www.NorthCarolinaPreppersNetwork.net
North Carolina Prepper sNetwork Est. Jan 17, 2009 All contributed articles owned and protected by their respective authors and protected by their copyright. North Carolina Preppers Network is a trademark protected by American Preppers Network Inc. All rights reserved. No content or articles may be reproduced without explicit written permission.